Introduction
SOAP (Simple Object Access Protocol) is a messaging protocol specification for exchanging structured information in the implementation of web services, by using the XML Information Set as its message format (source: https://en.wikipedia.org/wiki/SOAP). The messages can go through a variety of application layer protocols, for instance HTTP(s).
In this article we will see how to generate C# code from a WSDL file by importing it into our .NET Core Project, and see some of the common problems that sometimes arise with this functionality.
Context
- SOAP
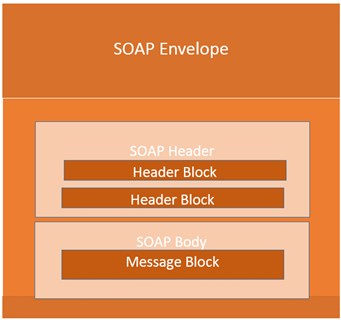
The SOAP specification defines something known as a "SOAP message" which is what is sent to the web service and the client application.
The below diagram of SOAP architecture shows the various building blocks of a SOAP Message.
To describe the functionalities of a SOAP based web service, a XML based definition language called WSDL (Web Service Description Language) is used.
WSDL files are necessary for testing SOAP-based services. Most tools used to test SOAP web services, as well as .NET Core projects, uses WSDL files to generate test requests, assertions and mock services. WSDL files define various aspects of SOAP messages:
- Whether any element or attribute is allowed to used multiple times
- The required and/or optional elements and attributes
- A specific order of the elements, if required
- WCF
Windows Communication Foundation (WCF) is a framework for building service-oriented applications (SOA – Service Oriented Architecture). With WCF, we can send data as asynchronous messages from one service endpoint to another. It was developed by Microsoft and launched with .NET Framework 3.0 with the objective of unifying existing technologies like COM+, MSMQ-Message Queue, Enterprise Services, .NET Remoting and Web Services.
- .NET Core
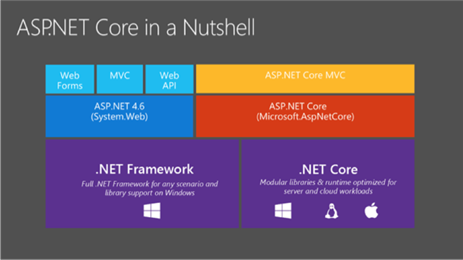
.NET Core is a web-development framework for building web apps on the .NET platform. It can be used to develop different types of applications such as mobile, desktop, web, cloud, IoT, machine learning, micro services, games and so on.
It is an open-source framework maintained by Microsoft that can run on Windows, macOS or Linux, each with a different runtime that executes the code and generates the same output.
Implementation
For this example we will first set up our Visual Studio in order to allow it to create WCF Web Service References, and only then configure our project to use a client to consume the web service. We will use a test web service available at http://www.dneonline.com/calculator.asmx?wsdl to demonstrate the functionality. For simplicity we will see how to implement a client for operating on the web service that will be used on a WEB API .NET project.
– Install Microsoft WCF Web Services Reference Provider in Visual Studio
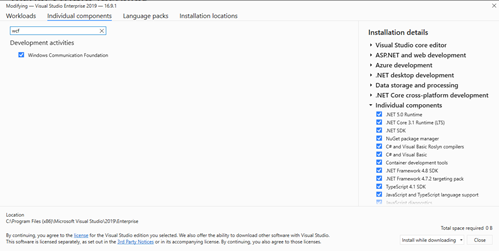
Before anything else, we must check if Visual Studio has the extension for Microsoft WCF Web Service Reference Provider installed. In older versions of Visual Studio it may be already installed by default, but in newer versions you must add the extension manually.
In order to do that, we must go to to the menu Tools -> Get Tools and Features... (or directly to the Visual Studio Installer) and search for the individual component “Windows Communication Foundation”, as shown in the following image:
– Create .NET Core WEB API project
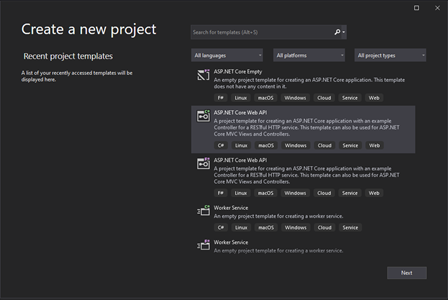
We can now go ahead and create a new project. We will use a ASP.NET Core Web API template for this example.
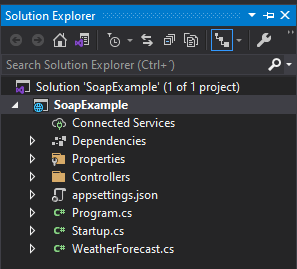
After creating our project, we will have this folder structure:
– Generate reference code from a WSDL file
By right-clicking the Connected Services seen in the previous image, you will have the option to add a new connected service:
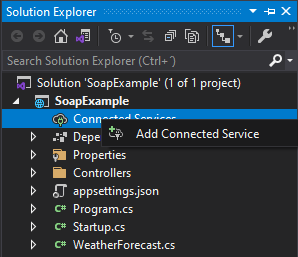
If the WCF extension is installed correctly, you will have an option to add a WCF Web Service Reference provider.

By providing the WDSL URI and clicking “Go”, you will obtain a list of services and its methods, and a Namespace that you will user to reference the methods in the project.
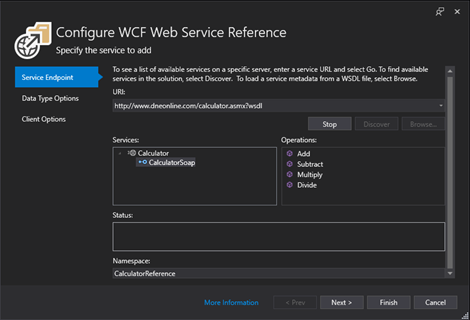
By clicking next, you will configure some settings, like for example the type of collections should be generated. We will choose System.Collections.Generic.List for our example.
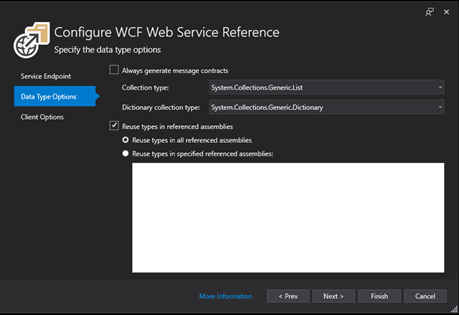
By clicking next again, we will see the last screen for the configuration of the WCF Web Service Reference, that allows us to choose if we want the classes generated to be public or private, and if we want to generate synchronous methods in addition to the asynchronous ones that are generated by default.
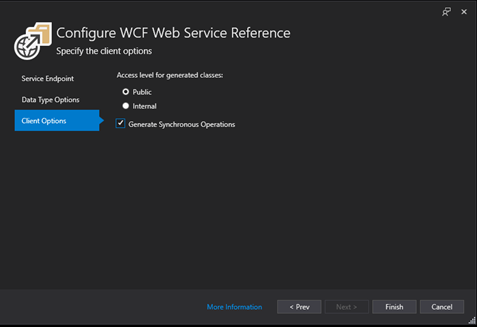
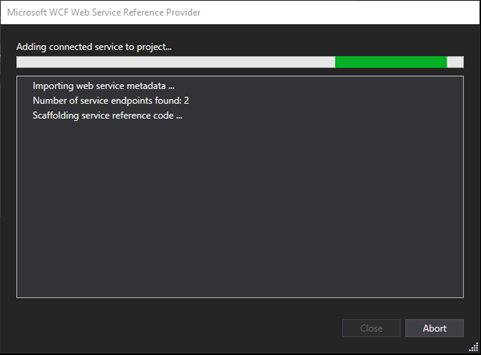
By clicking finish, the scaffolding will begin, and our classes generated.
– Using Connected Service
After the process is finished, we will have in our Solution Explorer the connected service available, with our generated reference, where we will have our endpoints and methods configured.
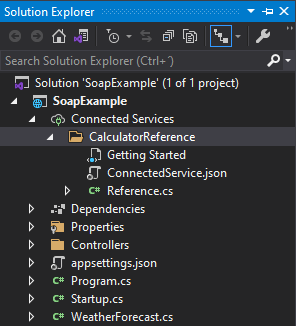
Since we’ve chosen to generate the synchronous methods as well, we will have several methods:
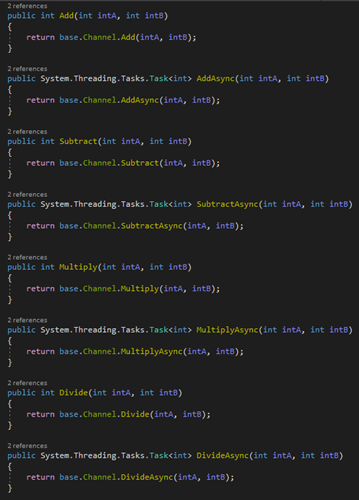
And also the Endpoints:
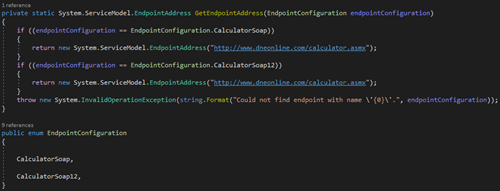
So now that we have a connection to the web service, we can start using it in our project. Let’s start by creating a new controller to demonstrate the usage of the newly created connected service.
We start by adding to the Controllers folder a new controller called Add:
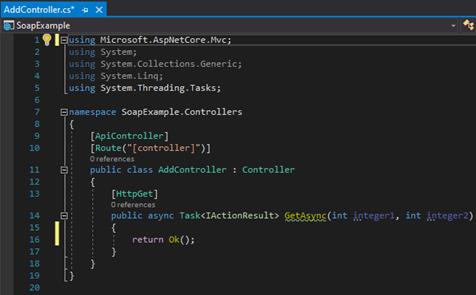
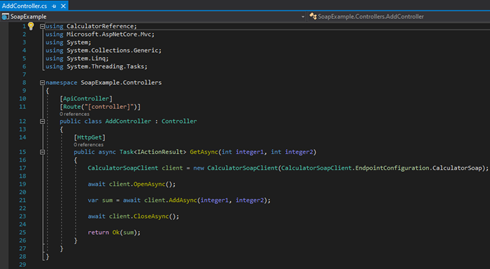
Next, we will create a client to communicate with our connected service. For that, we must make a reference to our Calculator Reference, and indicate to the client which Endpoint will be used:
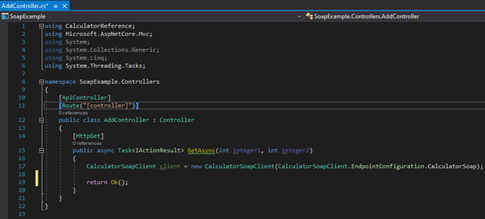
The client should be opened before usage, and closed after receiving the results, so lets call the add method of our web service and see if we can obtain the sum between integer1 and integer2. Don’t forget to make the method Get asynchronous:
So lets go ahead and make our request to our controller, inserting a value for integer1 and integer2:

As a result we obtain the sum of the two integers:

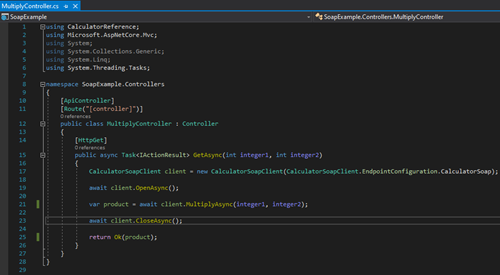
It worked! We can use other methods of our web service, like multiply:


– Possible problems
Sometimes errors can occur that are difficult to pinpoint, so here are some of them:
- Each child element has its own declaration of namespaces, instead of inheriting from parent or root node
Some web services don’t allow each element in the payload to have its own namespaces, instead, inheriting from its parent.
<test:Parent xmlns:test="http://myschema.org">
<test:Child1 xmlns:test="http://myschema.org">Test1</test:Child1>
<test:Child2 xmlns:test="http://myschema.org">20</test:Child2>
</test:Parent>
To resolve this, we must declare that the parent is a wrapper element and a root node:
[System.ServiceModel.MessageContractAttribute(IsWrapped=true, WrapperName = "Parent", WrapperNamespace = "http://myschema.org")][System.Xml.Serialization.XmlRoot(Namespace = "http://myschema.org")]public partial class ParentWrapper {}
And so, the XML will be serialized:
<test:Parent xmlns:test="http://myschema.org"> <test:Child1>Test1</test:Child1> <test:Child2>20</test:Child2></test:Parent>
- Elements have xsi:nil=”true” attributes
Sometimes web services do not allow to mark null values as xsi:nil=”true”, so instead we should remove these elements by removing the “IsNullable=true” attribute from the XmlElement declaration in the generated code. Instead of this:
[System.Xml.Serialization.XmlElementAttribute(IsNullable=true)]
It should read:
[System.Xml.Serialization.XmlElementAttribute()]
Conclusion
We’ve learned how to consume web services starting from a WSDL file, generating code through our .NET Core project and went through some of the common problems that could arise after the code is generated.
It’s a valuable time saving tool that can simplify our work, and maintain our project clean and organized.
#SOAP #WebServices #.NETCore
